Singapore’s relentless afternoon heat instantly exposes any weakness in your cooling system. We founded Cool Earth Aircon Services in 2007 as a one-man operation when Brian completed his technical apprenticeship. His goal was simply to fix the recurring issues that frustrated homeowners the most.
Our team now handles dozens of ‘aircon not cold’ calls every single week across the island.
Most property owners assume the worst when their living room starts feeling like a sauna. We consistently find that the majority of these issues stem from straightforward maintenance oversights. Ignoring a minor drop in cooling performance usually leads to a much more expensive repair bill down the road.
The facts reveal exactly what is failing inside these units. Our guide breaks down the eight most common causes and outlines the exact steps to restore your comfort.
1. Dirty or Clogged Air Filters
Likelihood: Very High | Fix: DIY
A blocked filter stands as the absolute most common culprit behind weak cooling performance. We see this issue in nearly half of the residential service calls we attend. Dust and debris choke the airflow before it can reach the evaporator coil. This restriction means your system works significantly harder to push less air into your room.
Our research aligns with recent energy studies showing that replacing a dirty filter improves air conditioner efficiency by up to 15 percent. The National Environment Agency (NEA) also highlights that clogged components force units to consume far more electricity. Using a basic MERV 8 filter works best for Singapore homes, as higher ratings sometimes restrict airflow too much in standard split systems.
How to Check
Checking your filter takes less than two minutes and requires no special tools. We recommend making this a regular part of your household routine.
- Turn off the power: Always switch off the unit at the wall before opening the panel.
- Open the cover: Gently lift the front plastic fascia of your indoor fan coil unit.
- Slide out the mesh: The primary filters usually slide right out from their tracks.
- The light test: Hold the filter up to a bright window or overhead light.
- Assess the blockage: If you cannot see light shining through the mesh, the filter requires immediate cleaning.
What to Do
Cleaning these filters is a straightforward process that restores airflow almost instantly. We advise taking the filters to a well-ventilated washing area like a bathroom or service yard.
A helpful pro-tip is to gently vacuum the heavy dust off the dry filter before getting it wet. This prevents the dirt from turning into stubborn mud. Next, rinse the mesh under lukewarm running water. You can use a soft brush and mild dish soap to remove greasy buildup if the unit is located near an open kitchen.
Our technicians always warn customers never to dry filters in direct sunlight. The intense heat often warps the plastic frame, making it impossible to reinstall properly. Let them air dry completely in a shaded spot before sliding them back into place. If clean filters do not solve your problem, the issue definitely lies deeper within the system.
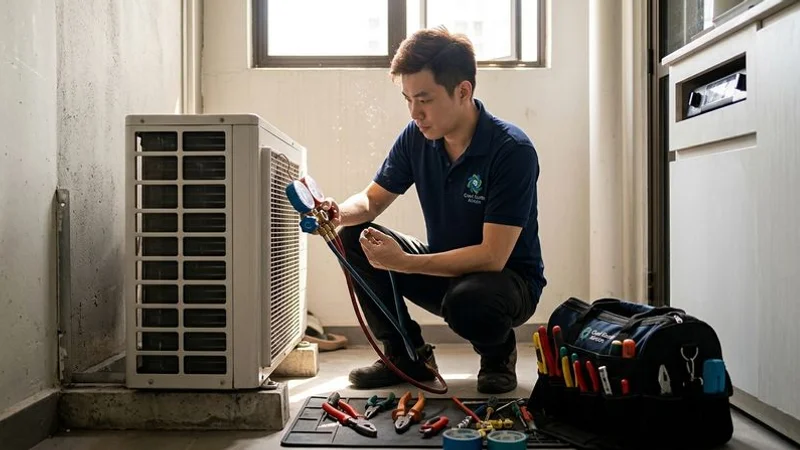
2. Low Refrigerant Gas
Likelihood: High | Fix: Professional Gas Top-Up
Refrigerant gas acts as the vital heat transfer fluid inside your system. We frequently explain to customers that air conditioners do not consume gas like a car consumes petrol. If your system lacks refrigerant, a physical leak exists somewhere in the copper piping network.
Our standard diagnostics involve checking specific pressure readings to confirm the exact levels. For modern 2026 systems using R32 refrigerant, a healthy suction pressure typically sits between 115 and 135 PSI. Older units using R410A operate at slightly lower pressures. A significant drop below these thresholds completely disrupts the cooling cycle.
Signs of Low Gas
You will notice several clear warning signs if your refrigerant levels fall too low. We advise keeping an eye out for these specific symptoms.
- Weak cooling: The unit runs constantly but only produces slightly cool air.
- Ice formation: Visible ice builds up on the copper pipes connecting the indoor and outdoor units.
- Hissing sounds: A faint bubbling or hissing noise emerges from the indoor fan coil.
- Erratic cycling: The outdoor compressor turns on and off far more frequently than normal.
Why Gas Levels Drop
Leaks typically occur at vulnerable connection points. We often find micro-leaks at the flare joints where the copper pipes meet the indoor unit. Vibration from the compressor over several years gradually loosens these critical connections.
A reliable professional always performs a leak test before recommending a gas top-up. Our preferred method is applying a specialized soap solution to the joints to watch for bubbling, which accurately pinpoints the exact location of the escaping gas. Simply adding more refrigerant without sealing the breach means you will face the exact same problem a few months later.
Expect to pay between $40 and $100 for an older R22 gas top-up, while newer R32 and R410A refrigerants generally cost between $90 and $150 depending on the required volume.
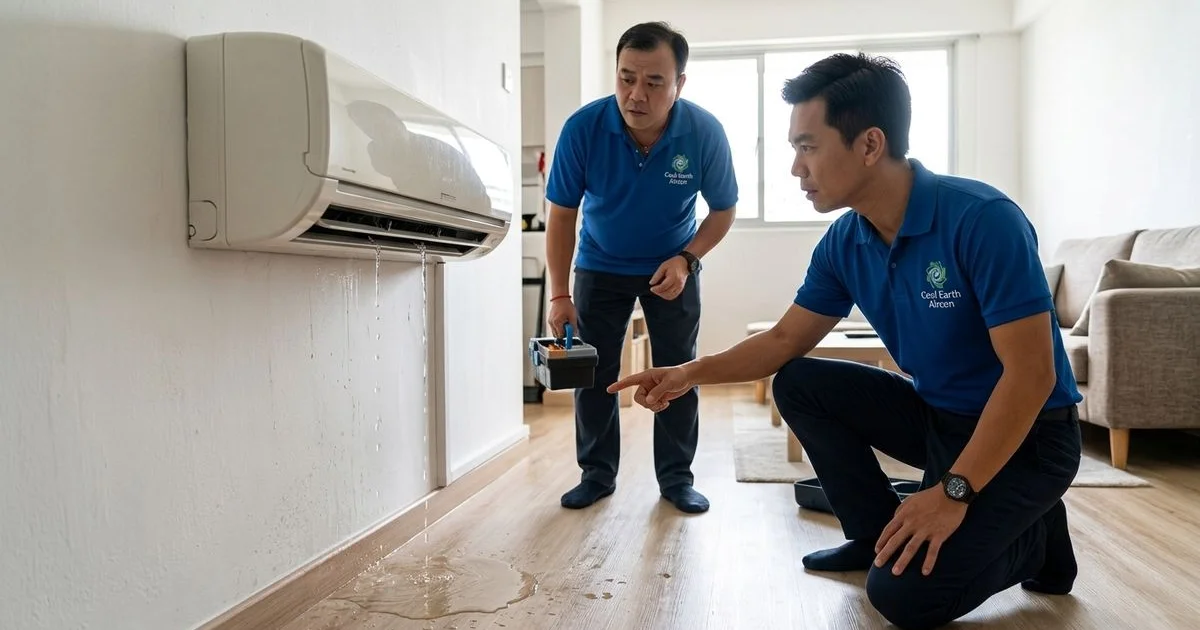
3. Frozen Evaporator Coil
Likelihood: Moderate | Fix: Professional
An icy buildup on the indoor coil completely blocks airflow and stops the cooling process cold. We encounter this issue regularly in older HDB flats where systems run for hours with dirty components. When the evaporator coil freezes, the room temperature rises while the unit struggles to push air through the solid block of ice.
Our technicians know that freezing usually stems from a severe drop in system pressure. This pressure drop causes the internal coil temperature to plummet below freezing, instantly turning the ambient humidity in your room into a thick layer of frost.
Common Causes of a Frozen Coil
Several underlying problems can trigger this frustrating chain reaction. We typically check for these primary culprits during a service call.
- Low refrigerant: Insufficient gas drops the operating pressure too low.
- Blocked airflow: A severely dirty filter prevents warm room air from keeping the coil above freezing.
- Filthy evaporator: A thick layer of grime insulates the metal fins and disrupts heat transfer.
- Blower motor failure: The indoor fan spins too slowly or stops entirely.
- Faulty expansion valve: This component fails to regulate the flow of cold liquid properly.
What to Do
The first step is always turning off the system entirely. We strongly advise against using sharp tools to chip the ice away. The thin copper tubing punctures incredibly easily, which transforms a minor defrosting job into an expensive coil replacement.
You should switch the unit to ‘Fan Only’ mode to speed up the melting process. Our experience shows this usually takes two to four hours depending on the room temperature. Place some old towels on the floor, as melting ice often overwhelms the drainage pan and causes temporary water dripping. Once the system thaws completely, clean your filters and test it again. If frost returns, a professional diagnostic is absolutely necessary.
4. Dirty Evaporator Coil
Likelihood: High | Fix: Professional Chemical Wash
Microscopic dust particles eventually bypass even the most diligently cleaned air filters. We regularly extract thick layers of dark, greasy grime from units located near residential kitchens or busy roads. This stubborn dirt settles directly onto the thin aluminum fins of the evaporator coil.
Our energy efficiency data shows that a heavily fouled coil acts like a thick blanket. It physically prevents the cold refrigerant inside the pipes from absorbing the heat from your room. The National Environment Agency points out that units struggling against dirty coils consume significantly more electricity to achieve the same set temperature.
You will typically notice a gradual decline in performance rather than a sudden breakdown. We often hear customers complain that their system takes twice as long to cool the bedroom at night.
The Fix
Standard water pressure cannot penetrate the deep crevices of a heavily soiled coil. We utilize professional-grade, alkaline-based solutions during a chemical wash to dissolve this hardened organic matter safely. Unlike harsh acidic cleaners that strip the protective coating off the metal fins, alkaline formulas break down mold and grease without damaging the fragile aluminum.
For severe cases suffering from years of neglect, a complete chemical overhaul is required. Our technicians will pump down the gas, completely dismantle the indoor unit, and wash the individual components in a chemical bath. This rigorous process restores the system to near-factory cooling efficiency. Expect a standard chemical service to cost between $80 and $150 per unit in Singapore.
5. Faulty or Failing Compressor
Likelihood: Low to Moderate | Fix: Professional (Expensive)
The compressor functions as the powerful heart of your entire cooling system. We consider compressor failure to be the most severe and costly breakdown a homeowner can face. It sits inside the outdoor condensing unit and physically pumps the refrigerant gas through the miles of copper piping.
Our service records indicate that premature compressor death almost always results from chronic poor maintenance. Forcing the system to operate with low gas or blocked coils puts immense thermal stress on the internal motor windings until they eventually short out.
Signs of Compressor Issues
Identifying a failing compressor early sometimes prevents a catastrophic burnout. We train our staff to listen and look for these specific mechanical warnings.
- Hard starting: The outdoor unit vibrates violently or makes a loud grinding noise when turning on.
- Tripping breakers: The electrical draw spikes so high that it instantly trips your main circuit breaker.
- Dead silence: The outdoor fan spins perfectly, but the low, steady hum of the compressor is missing.
- Warm air only: The system runs continuously but zero heat exchange occurs.
What to Do
Replacing this major component requires specialized welding and a complete vacuum of the refrigerant lines. We generally quote between $600 and $1,200 for a brand new compressor replacement, depending heavily on the unit’s capacity and the required labour.
Modern inverter compressors contain complex electronic boards that make repairs even more complicated. Our honest advice for systems older than seven years is to invest that repair money into a brand new, energy-efficient setup. A new 5-tick system dramatically lowers your monthly power bills and provides a fresh warranty for complete peace of mind.
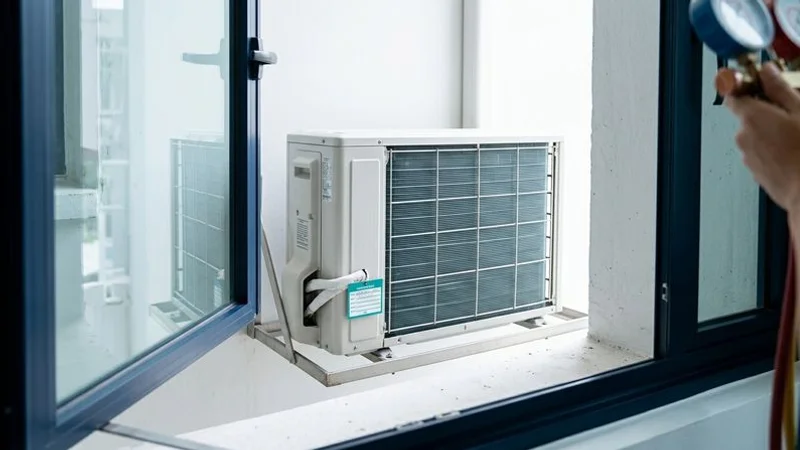
6. Blocked or Dirty Condenser (Outdoor Unit)
Likelihood: Moderate | Fix: DIY Check + Professional Clean
The outdoor condenser unit carries the heavy burden of releasing all the extracted indoor heat into the humid Singapore air. We often find these vital units neglected because they sit out of sight on narrow HDB ledges or high condominium brackets. If the outdoor aluminum fins become choked with dirt, the trapped heat has nowhere to go.
Our technicians frequently clear away shocking amounts of urban debris during routine maintenance. A blocked condenser causes the internal pressure to spike dangerously high, which triggers the system’s safety switches to shut off the cooling cycle entirely to prevent an explosion.
Common Issues
Outdoor units face a harsh environment every single day. We encounter a surprising variety of obstructions blocking crucial airflow.
- Environmental debris: Thick dust, dried leaves, and even plastic bags clinging to the air intake.
- Nesting animals: Mynah birds frequently build dense nests inside the warm casing of HDB ledge units.
- Poor placement: Homeowners stacking cardboard boxes, bulky laundry racks, or potted plants directly against the fan grille.
- Corrosion: Salty air near coastal areas eating away at the fragile heat exchange fins.
What to Do
Visual inspection remains your best defense against outdoor unit failures. We suggest peering out the window at your condenser at least once a month. Ensure there is a minimum clearance of 30cm around the front and sides of the metal casing to allow proper heat dissipation.
If you spot thick cobwebs or loose dirt on the exterior fins, you can carefully brush them away with a soft broom. Our safety protocol strictly forbids leaning out of high-rise windows to hose down the unit. Leave the deep chemical cleaning of the outdoor condenser to a qualified professional who has the proper safety harnesses and pressure washing equipment.
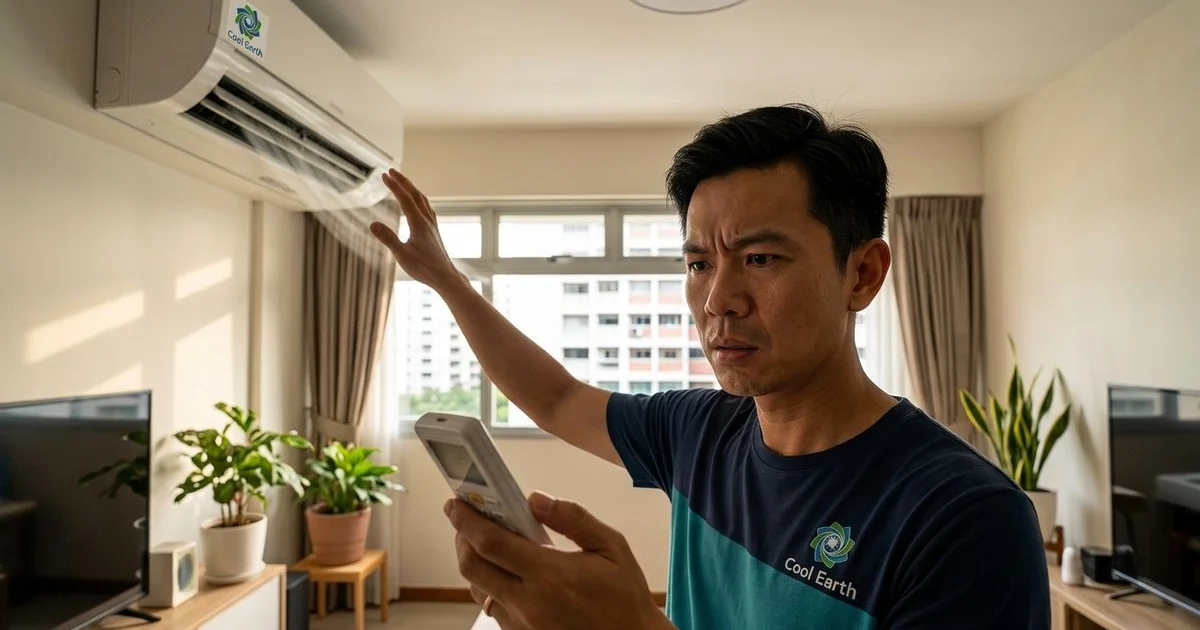
7. Thermostat or Sensor Problems
Likelihood: Low to Moderate | Fix: Professional
The thermistor acts as the electronic brain sensing the actual temperature inside your bedroom. We occasionally discover that cooling problems stem from this tiny, inexpensive component rather than a major mechanical failure. This small sensor sits right in front of the evaporator coil to monitor the air being pulled into the system.
Our electronic diagnostic tools quickly identify when a sensor falls out of calibration. If the thermistor drops out of its protective plastic clip and touches the freezing metal coil, it falsely signals the main board that the room is already freezing. The system then prematurely cuts off the compressor, leaving you sweating in a warm room.
Signs of Thermostat Issues
Sensor failures produce very distinct operating patterns. We ask customers to describe the system’s behaviour to pinpoint this exact fault.
- Short cycling: The compressor fires up but shuts down after only two or three minutes.
- Temperature mismatch: The room feels incredibly warm despite the remote displaying a crisp 20 degrees.
- Total unresponsiveness: Changing the temperature setting on the remote control produces zero change in the unit’s output.
What to Do
Fixing this issue requires opening the electrical control box inside the indoor unit. We use a digital multimeter to test the resistance of the thermistor wire against the manufacturer’s specified ohms rating.
Replacing a faulty sensor is a relatively quick and affordable job. Our typical pricing for diagnosing and swapping a broken thermistor ranges from $80 to $150. Because the part is inexpensive, accurate troubleshooting by an experienced technician is the real value of this repair call.
8. Undersized Unit for the Room
Likelihood: Moderate (especially after renovation) | Fix: Replace Unit
Installing an air conditioner with insufficient cooling capacity guarantees years of high electrical bills and poor comfort. We constantly see homeowners attempt to cool massive, open-concept living rooms with tiny 9,000 BTU bedroom units. An undersized system simply lacks the sheer volume to overcome the heat load of a large space.
Our calculations must account for Singapore’s intensifying Urban Heat Island (UHI) effect. The ambient temperature radiating off concrete walls stays remarkably high even after sunset. A small unit running continuously at 100 percent capacity never actually achieves your desired set point, which dramatically shortens the lifespan of the compressor.
When This Happens
Capacity mismatches usually occur following major home changes. We notice this problem spikes right after interior renovation projects.
- Hacking walls: Combining two smaller bedrooms into one large master suite without upgrading the fan coil.
- Balcony enclosures: Expanding the living room outward into a space surrounded by hot, uninsulated glass.
- Changed room usage: Converting a quiet study into a home gym or a server room packed with heat-generating computers.
- Direct afternoon sun: West-facing walls absorbing severe solar radiation from 3pm to 7pm.
BTU Guide for Singapore
Selecting the right size requires matching the British Thermal Units (BTU) to your exact floor plan. We rely on this updated sizing matrix for standard residential ceiling heights.
| Room Size | Recommended Capacity | Typical Setup |
|---|---|---|
| Small bedroom (up to 100 sq ft) | 9,000 BTU | Single split fan coil |
| Medium bedroom (100-150 sq ft) | 12,000 BTU | Single split fan coil |
| Living room (150-250 sq ft) | 18,000 BTU | High-capacity single unit |
| Large living room (250-350 sq ft) | 24,000 BTU | Multi-split or light commercial |
| Open-plan layout (350+ sq ft) | 24,000+ BTU | Dual units or cassette system |
You must add 20 to 30 percent extra capacity for rooms featuring massive glass windows or facing the harsh afternoon sun. Our installation team strongly recommends erring on the higher side given the extreme tropical climate.
If your current unit simply cannot handle the physical space, upgrading is your only permanent solution. Check our installation service for detailed options and upfront pricing on high-capacity models.
Quick Troubleshooting Checklist for an Aircon Not Cold
Running through a few basic checks often saves you the cost of an unnecessary service visit. We assembled this straightforward list based on the most common user errors we encounter. Take five minutes to verify these settings before picking up the phone.
- Verify the remote mode: Ensure the icon shows the ‘Cool’ mode snowflake, not the water drop (Dry) or the fan blade (Fan only).
- Adjust the set point: Drop the temperature setting down to 22 degrees and set the fan speed to maximum to force the compressor to engage.
- Inspect the outdoor fan: Look out the window to confirm the large fan blade inside the condenser unit is actively spinning.
- Listen for warning sounds: Pay attention to any strange noises, as Grinding, rattling, or hissing indicates severe mechanical or gas pressure issues.
- Look for frozen pipes: Check the thick copper lines connecting the units; visible white frost immediately confirms a serious system fault.
- Perform a hard reset: Switch off the main electrical breaker for a full three minutes to clear any electronic glitches from the control board.
If the air remains stubbornly warm after completing these steps, a physical component has likely failed. Our team is always ready to step in when DIY methods reach their limit.
When to Call Cool Earth Aircon
Most of the complex faults detailed above require specialized diagnostic tools and licensed expertise to resolve safely. We highly encourage property owners to address cooling drops immediately rather than waiting for a total breakdown. A struggling system works its compressor in extreme overdrive. This constant strain easily turns a simple, inexpensive gas leak repair into a catastrophic compressor burnout if ignored for too long.
Our entire business model at Cool Earth Aircon relies on accurate, honest diagnostics. The company commits to a few core principles for every single service call:
- No unnecessary upselling: The team absolutely refuses to push a costly chemical wash if a basic gas top-up will solve your problem.
- Logical troubleshooting: We will never suggest pumping new refrigerant into a system suffering from a severely blocked evaporator coil.
- Transparent pricing: You can review our complete servicing price list online for guaranteed rates with zero hidden fees.
We proudly service every major brand installed in Singapore, including Daikin, Mitsubishi Electric, Panasonic, LG, and Fujitsu. The technicians travel to all residential estates and commercial districts across the island.
Aircon not cold and not sure what to do next?
WhatsApp us right now at wa.me/6594273833 with a quick description of your problem. Our experienced technicians will advise you on the best course of action before you even book a home visit.

Brian founded Cool Earth Aircon in 2007. With 18 years of hands-on experience servicing aircon systems across Singapore, he leads a team that has maintained over 4,560 units.
Licensed Aircon Technician | 18 Years Experience | Three Best Rated (Tampines)