We often see homeowners confused about the difference between a quick wipe-down and a genuine deep clean. Many property owners assume a standard service handles all the grime hiding inside their cooling units. That assumption usually leads to higher electricity bills and sudden breakdowns.
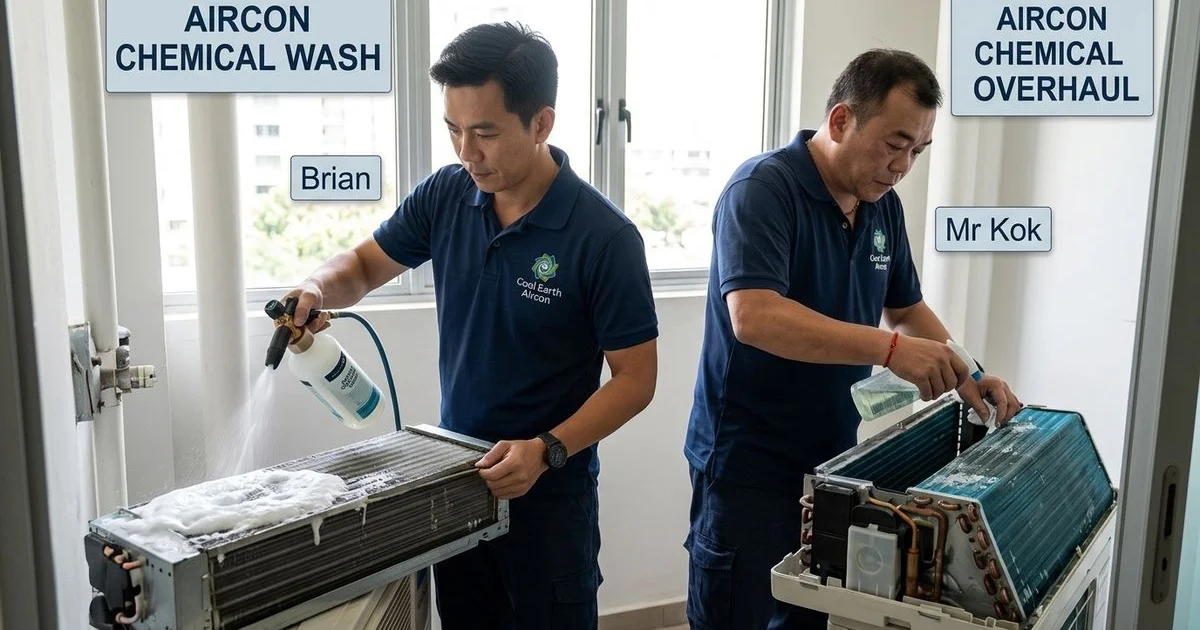
Our company, Cool Earth Aircon Services, has been tackling these exact issues across Singapore since Brian founded the business back in 2007.
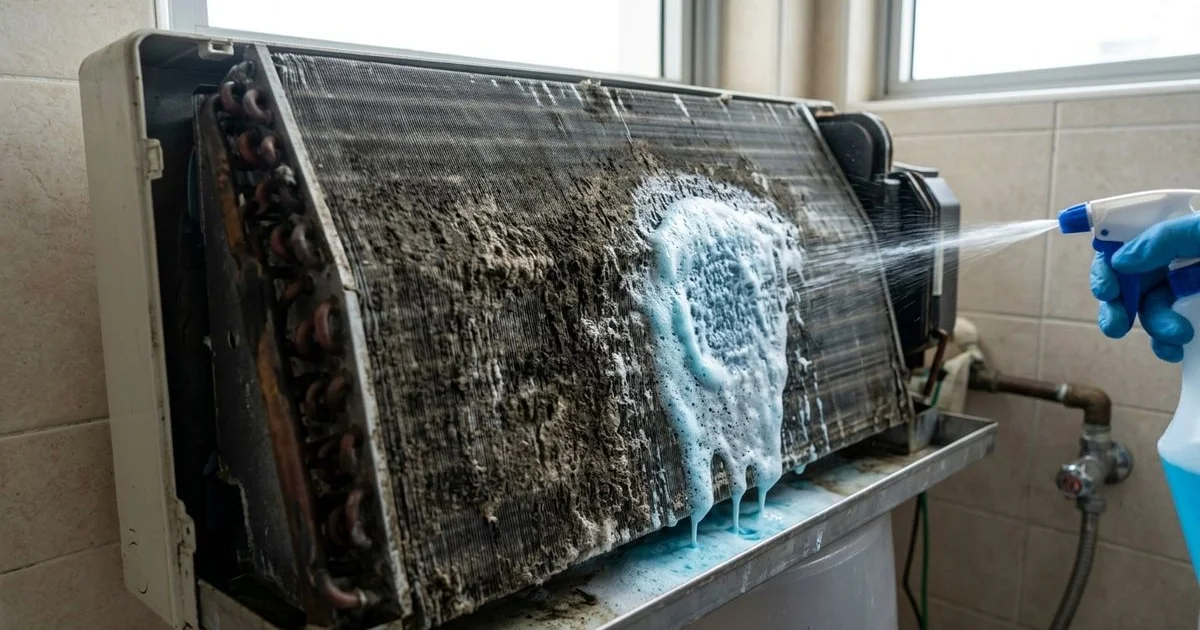
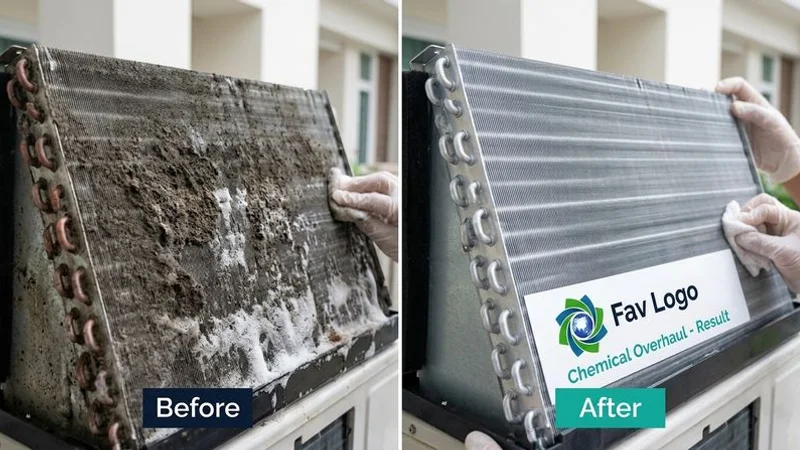
The phrase chemical wash gets thrown around a lot, yet very few people know what the process actually looks like behind the plastic covers. You might wonder if it just means spraying a foam cleaner from the hardware store.
We are going to clarify exactly what a professional deep clean involves. The data clearly shows why this specific maintenance matters for both your wallet and your indoor air quality. If you are wondering what happens during an aircon chemical wash? Step-by-step process details are provided below to show exactly how our technicians restore your cooling power.
Chemical Wash vs General Servicing: The Key Difference
Our clients frequently ask why these two services carry different price tags. The answer comes down to the depth of the cleaning process and the tools required.
General servicing is a routine maintenance visit. This basic upkeep includes:
- Filter cleaning
- Surface wiping of visible coil areas
- Drainage pipe flushing
- Basic inspection
We complete this quick tune-up in about 15 to 20 minutes per unit. Industry averages in Singapore for 2026 price this standard service between $40 and $60 per unit, and you can check our servicing price guide for current rates.
A chemical wash goes much deeper into the machine, using alkaline-based solutions to dissolve stubborn grime, mould, and biofilm that simple water cannot remove. Our technicians typically need 30 to 45 minutes to perform this thorough cleaning.
You should schedule this intensive service every 6 to 12 months, or whenever you spot problems like reduced cooling, musty smells, or frequent water leaks.
| Service Type | Time Required | 2026 Average Cost (SG) | Best For |
|---|---|---|---|
| General Servicing | 15-20 mins | $40 - $60 | Routine upkeep (every 3-4 months) |
| Chemical Wash | 30-45 mins | $80 - $150 | Deep cleaning, bad odours, water leaks |
What Happens During an Aircon Chemical Wash? Step-by-Step Process Revealed
Step 1: Initial Inspection and Preparation (5 Minutes)
Our process always begins with a comprehensive pre-wash assessment. The technician switches off the aircon unit and evaluates its current condition.
This initial check is absolutely vital for diagnosing hidden faults. We use specific metrics to identify the following issues:
- The exact level of contamination (light, moderate, or severe)
- Any unusual sounds, cooling problems, or drainage blockages
- Whether a standard wash is enough or a full overhaul is necessary
- The baseline temperature output (measured directly at the vent)
Technicians rely on accurate tools like a Fluke infrared thermometer to capture the exact pre-wash temperature. A baseline reading of 18 degrees Celsius might seem fine, but a healthy unit should ideally push out air closer to 11 to 14 degrees.
Our next step involves securing the work area to prevent any property damage. Proper wall protection using waterproof canvas sheets ensures zero water spillage in your HDB flat or condominium.
Step 2: Dismantle the Front Panel and Remove Filters (5 Minutes)
We start the physical teardown by opening the front panel and removing the dirty air filters. The exact dismantling method varies depending on whether you own a Daikin iSmile, a Mitsubishi Starmex, or a Panasonic model.
Certain units require the removal of several specific components for proper access:
- The main plastic front housing
- Directional air vanes
- Decorative outer covers
- Primary dust filters
We carefully unclip these delicate plastic parts to avoid snapping the hinges. The filters are set aside for a dedicated washing session later, receiving a separate chemical soak and rinse before reinstallation.
Our technicians can now visually inspect the bare evaporator coil, the fan blower, and the primary drainage tray. Many homeowners experience a bit of a shock at this exact moment, as a thick layer of mould and dust often hides just behind a perfectly clean-looking white plastic cover.
Step 3: Apply Chemical Cleaning Solution (10-15 Minutes)
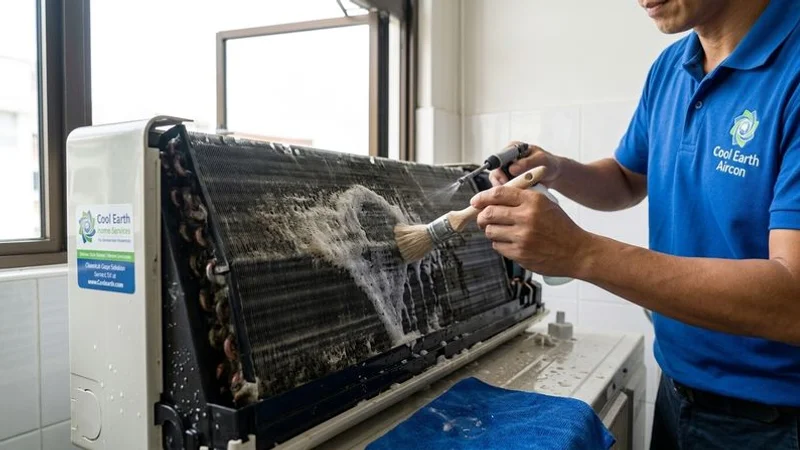
Our core cleaning phase relies on highly effective, professional-grade formulas. The technician uses a pump sprayer to apply a specialised alkaline coil cleaner, such as Mr McKenic, to several critical components:
- Evaporator coil: Technicians spray the chemical directly onto the aluminium fins, allowing it to penetrate the tight metallic gaps. The foam instantly reacts with organic matter like mould and bacteria, while also dissolving inorganic cooking grease and dust.
- Fan blower: The cylindrical fan blower sits hidden below the evaporator coil. A heavy layer of dirt here can severely drop the fan’s RPM (revolutions per minute), reducing total airflow by a massive 30 to 50 percent. We coat the blades entirely to melt away the sticky grime.
- Drainage tray: The condensate pan collects all the dripping water and frequently breeds thick, jelly-like bacterial slime. The technician thoroughly coats this tray to prevent future pipe clogs.
Our strict policy requires leaving the chemical to soak for a minimum of 10 to 15 minutes. This specific dwell time allows the alkaline agents to break down calcified dirt without damaging the copper pipes. Any contractor who sprays and immediately rinses is simply rushing the job and cheating you of a proper clean.
Step 4: Flush and Rinse (10 Minutes)
We move to the rinsing phase once the chemical has fully dissolved the internal buildup. The technician brings in a specialized high-pressure washer, typically a Karcher K2 model operating around 100 to 120 bar pressure, to blast away the debris.
This powerful water flush achieves two critical goals:
- Remove dissolved contaminants: The water carries away every trace of the broken-down slime and dust.
- Neutralise residual chemical: A thorough rinse dilutes any leftover alkaline foam so it leaves absolutely no harsh chemical odour behind.
Our team pays special attention to the entire length of the drainage system during this step. High-pressure water forces out any remaining jelly-like bacterial clumps hiding deep inside the PVC pipes.
You will probably see a stream of dark black or brown water flowing into the collection bucket. This dirty water serves as visible proof of exactly what was circulating through your living room air just moments prior.
Step 5: Reassemble, Test, and Verify (5-10 Minutes)
We carefully piece the air conditioning unit back together once every part is completely dry. The technician reinstalls the fresh filters, secures the plastic housing, and wipes down the exterior casing.
The final step involves turning the machine on for a rigorous post-wash diagnostic. Our quality checklist covers several specific performance metrics:
- Temperature output: The technician takes a fresh reading at the vent using the infrared thermometer to ensure output drops to a crisp 11 to 14 degrees Celsius.
- Airflow strength: Clean blades allow the fan blower to spin at maximum speed, creating noticeably stronger airflow.
- Drainage flow: Condensation water must flow smoothly out of the external pipe with zero dripping from the indoor fancoil.
- Air quality: The breeze coming from the vent should smell completely neutral and fresh.
The service team will only pack up their tools once the system passes every single one of these checks. You get immediate, measurable proof that the service worked.
Professional-Grade Cleaning Solutions
We strictly avoid generic household detergents when servicing sensitive HVAC equipment. Professional-grade alkaline coil cleaners, such as those formulated by Nu-Calgon or Mr McKenic, contain a highly specific blend of active ingredients.
These specialized liquids usually feature:
- Surfactants: These agents break surface tension, allowing the liquid to seep into microscopic gaps between the fins.
- Antimicrobial agents: These chemicals actively destroy mould spores, algae, and harmful bacteria.
- Alkaline compounds: A safe pH level between 7 and 9 dissolves organic slime without eating into the metal.
- Corrosion inhibitors: These protective additives coat the copper pipes and aluminium fins to prevent future rusting.
Our preferred solutions remain entirely biodegradable and safe for indoor residential use. They rinse away cleanly, leaving zero toxic residue circulating in your breathing air.
You should be extremely cautious about using cheap, off-the-shelf DIY cleaning sprays. Many supermarket foam cans rely on harsh acidic formulas that can quickly strip away the evaporator coil’s hydrophilic coating. This protective layer helps condensation sheet off the metal smoothly, and destroying it will cause your unit to spit water into your room.
Expected Servicing Timelines
We always tell clients to block out at least 45 minutes for a single wall-mounted unit. The cleaning process follows a strict timeline that cannot be safely rushed.
Here is the realistic, minute-by-minute breakdown of a proper service:
| Service Step | Estimated Time |
|---|---|
| Inspection and site preparation | 5 minutes |
| Dismantling covers and filters | 5 minutes |
| Chemical application and soak time | 10-15 minutes |
| High-pressure flush and rinse | 10 minutes |
| Reassembly and post-wash testing | 5-10 minutes |
| Total Time Per Unit | 30-45 minutes |
Our teams can efficiently stagger the workflow when handling common HDB multi-split setups. The technician will apply the foam to the living room unit and let it soak while dismantling the bedroom unit.
A standard System 3 (three indoor units) generally requires about 1.5 to 2 hours to complete. Larger System 4 or commercial setups will take proportionally longer depending on the layout.
Any contractor promising to clean four separate air conditioners in 30 minutes is cutting corners. The mandatory alkaline soak time alone demands 10 to 15 minutes to properly melt away the biofilm.
Immediate Benefits and Long-Term Results
Our customers generally notice a drastic change in air quality the moment the technician turns the machine back on. The air blowing from the vent will feel distinctly colder and push further across the room.
Here is what you can expect in the days following the service:
- The First 24 Hours: You might detect a very faint, clean scent from the neutralised cleaning agents. This fresh smell is perfectly normal and will fade after the first hour of active cooling.
- The First Week: The compressor will stop struggling to push air through blocked filters. The machine will begin cycling on and off naturally, rather than running continuously just to cool the space.
- The First Month: The National Environment Agency (NEA) in Singapore frequently notes that clean, well-maintained air conditioners consume significantly less electricity. A thoroughly cleaned evaporator coil typically generates energy savings of 10 to 20 percent on the cooling portion of your electrical costs.
We often see these efficiency gains translate to noticeably lower utility bills for households running their units every night. Regular maintenance essentially pays for itself through these long-term power reductions.
Identifying When an Overhaul is Necessary
We occasionally encounter machines that are simply too clogged for a standard on-wall service. A basic foam spray cannot rescue a unit that has been completely neglected for years.
A more invasive procedure is required when:
- The system has missed its regular maintenance schedule for over 18 months.
- Heavy, black mould has grown deep behind the rear drainage pan where wall-mounted tools cannot reach.
- The blower wheel is completely caked in hardened debris that requires physical scrubbing.
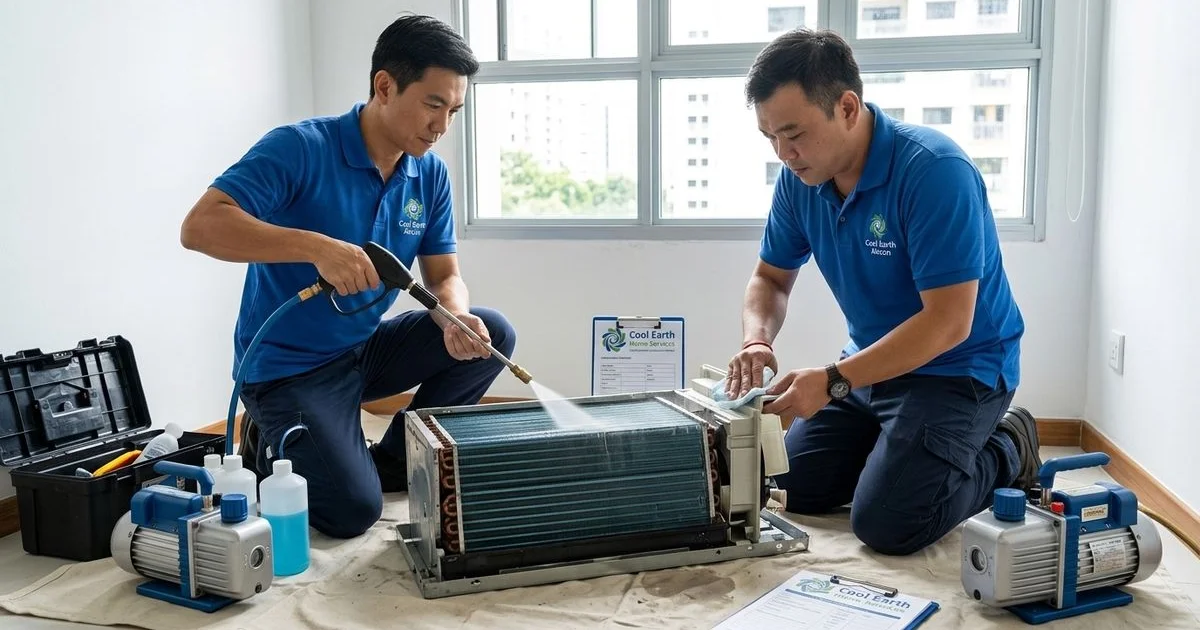
Our technicians will recommend a full chemical overhaul for these severe cases. This advanced service involves pumping down the refrigerant gas and completely removing the indoor fancoil from your wall.
The technicians then dismantle every single piece and submerge the coil and blower in a dedicated chemical bath. It takes roughly 1.5 to 2 hours per unit and costs between $130 and $180, but it cleans 100 percent of the internal surface area.
You can learn more about the specific differences in our detailed guide to chemical wash vs chemical overhaul. You can also review the common signs your aircon needs a chemical wash to catch problems early.
Selecting a Reliable Aircon Contractor
We urge all property owners to be highly selective when hiring an air conditioning technician in Singapore. A cheap, rushed job often results in damaged electronics or lingering chemical smells.
You should always verify a few key operational standards before booking a vendor:
- Proper site preparation: The crew must use waterproof canvas sheets to protect your flooring and furniture.
- Verified soak times: The technician must leave the foam on the coils for at least 10 minutes to properly dissolve the dirt.
- High-pressure flushing: The contractor must use a specialized machine like a Karcher water jet, not just a simple spray bottle, to rinse the unit.
- Post-service testing: The team should measure the final temperature and verify clear drainage before requesting payment.
- Safety certifications: Look for companies that adhere to bizSAFE standards to ensure safe operational practices inside your home.
Our team at Cool Earth Aircon has been strictly following this exact 5-step protocol since 2007. Every single job includes complete temperature testing before and after the service, providing you with verifiable proof of a job well done.
Ready to restore your cooling power? We encourage you to WhatsApp us at wa.me/6594273833 to secure a convenient booking slot.
Now that you know what happens during an aircon chemical wash? Step-by-step process transparency is what you can always expect from our team. The friendly dispatch staff handles all major brands across every residential and commercial area in Singapore.

Brian founded Cool Earth Aircon in 2007. With 18 years of hands-on experience servicing aircon systems across Singapore, he leads a team that has maintained over 4,560 units.
Licensed Aircon Technician | 18 Years Experience | Three Best Rated (Tampines)